
Plastering a ceiling is both a challenge and a rewarding task. It boosts your home’s look and makes it more durable. This DIY ceiling plastering tutorial will walk you through the key steps for a smooth surface. This surface is perfect for painting or decorating. Plaster has long been a top choice for ceilings, even with drywall becoming popular.
This guide will cover plastering’s details, like the tools you need and tips for ceiling plastering. Plastering means putting a mix of water, sand, and a binder on your ceiling for a lasting and beautiful finish. With the right skills and prep, you’ll be ready to change your ceiling.
Understanding the Basics of Plastering
Plastering is a skilled technique used to finish walls and ceilings. You might ask, what is plastering? It’s about applying a mix of mineral dust and water to create a surface that looks good and protects against moisture and other elements.
What is Plastering?
Plaster is made from water, sand, and binders like cement or lime. This mix makes a surface that’s smooth for painting or decorating. While drywall is often used in new buildings, plaster is still loved for its beauty and function. It’s a big part of decorative arts and architecture, showing its long history.
The Importance of Plastering in Home Renovation
Knowing how crucial plastering is in home renovation can change your project’s success. Using plaster makes structural elements last longer and look better. Experts use ceiling plastering techniques like wire lath and multiple coats for a top-notch finish.
Preparation is key before plastering. A clean surface is essential for good adhesion, avoiding problems like holes or cracks later. For DIY beginners, start with walls or spare drywall to gain experience before the ceiling. Or, get help from a trusted expert like Local Plasterer in Melbourne for top-quality results.
Essential Tools for Plastering a Ceiling
Having the right tools is key to a smooth, professional ceiling finish. The right equipment boosts your work efficiency and keeps you safe. Here are the must-have plastering tools and safety gear for your project.
Plastering Trowel and Hawk
The plastering trowel is a crucial tool. Choose quality ones like the Marshalltown Gold Permashape or OX for a smooth finish. Use a lightweight aluminum hawk, such as the Marshalltown Aluminum Plasterers Hawk, for easy handling and efficient plaster application.
Mixing Equipment and Materials
Getting your plaster mix right is vital. Start with a clean, dry 15-liter bucket. A high-quality electric mixer, like the Eibenstock Paddle Mixer, makes mixing easier and faster. This saves time and ensures the plaster is just right.
Don’t forget a bucket trowel for easy plaster transfer. The Ox bucket trowel is a budget-friendly choice. For comfort, use spatulas with soft grip handles, such as the CES’s Spatula Plus. They help smooth plaster and reduce hand strain.
Protective Gear for Safety
Wearing safety gear is a must to avoid dust, debris, and splashes. Always use gloves, goggles, and dust masks. A clean workspace and organized tools make plastering more effective. This lets you focus on achieving a perfect finish.
| Tool | Description |
|---|---|
| Plastering Trowel | Essential for applying and smoothing plaster, with options like Marshalltown Gold or OX trowel. |
| Hawk | Lightweight aluminum tool for holding plaster while applying; recommended is the Marshalltown aluminum hawk. |
| Mixing Bucket | At least 15 liters capacity; crucial for mixing plaster; keep it clean and dry. |
| Paddle Mixer | Electric mixer like the Eibenstock for efficient mixing, saving time and effort. |
| Bucket Trowel | Used for transferring plaster; a reliable choice is the Ox bucket trowel. |
| Spatula | Helps smooth plaster layers; CES’s Spatula Plus offers comfort with a soft grip. |
| Protective Gear | Includes gloves, goggles, and dust masks for safety during the plastering process. |
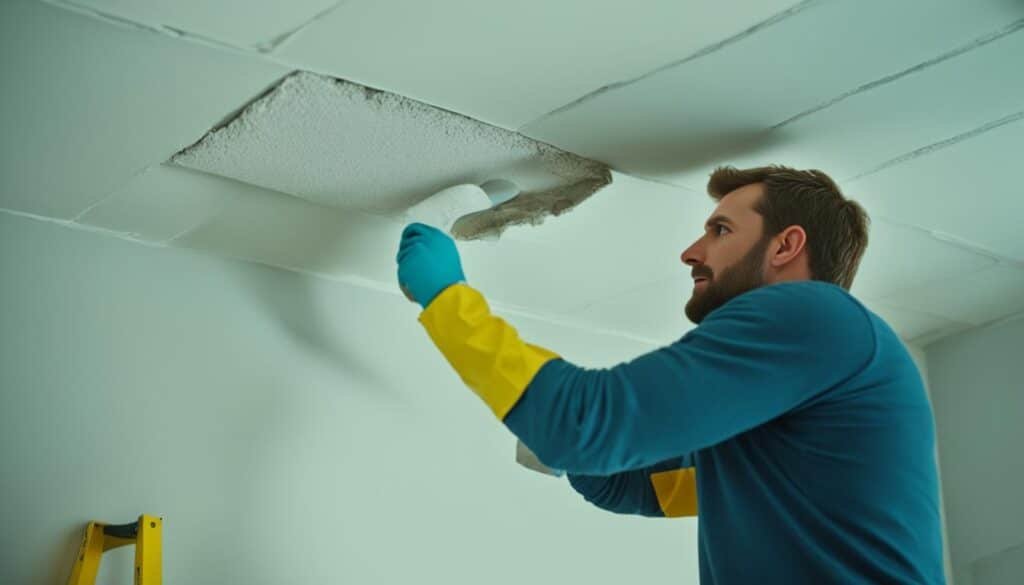
Preparing the Ceiling for Plastering
Getting your ceiling ready for plaster is key to a smooth finish. First, check the ceiling for any damage that needs fixing before plastering. This step is crucial to make sure the surface is perfect for plaster.
Assessing the Condition of Your Ceiling
Start by looking for cracks, holes, or water damage on your ceiling. Fixing these problems first ensures the plaster sticks well and lasts longer. This careful check is vital for a strong plaster job.
Cleaning and Prepping the Surface
After fixing any damage, clean the ceiling well. Dust, grease, or debris can stop plaster from sticking. Use a vacuum or a damp cloth to clean. Make sure the ceiling is dry before applying primer for the best results.
Applying Primer or Sealer
Applying primer is the last step before plastering. A good primer helps the plaster stick better, especially on rough surfaces. It also lowers the chance of plaster peeling off later. Using primer right is key to a great plaster job.
| Preparation Step | Description |
|---|---|
| Ceiling Assessment | Inspect for damage like cracks or water stains; make necessary repairs. |
| Cleaning the Surface | Remove dust, grease, and loose debris from the ceiling. |
| Applying Primer | Use a high-quality primer to enhance plaster adhesion, especially on porous surfaces. |
How to Plaster a Ceiling: Step-by-Step Guide
Plastering a ceiling can make a room look better. Follow this guide to get a perfect finish. First, collect your tools and materials like a hawk, trowel, mixing bucket, paddle, mask, goggles, clean water, and a wide brush.
Prepare your tools and materials first. Make a smooth plaster mix in your bucket, making sure it’s lump-free. Then, scoop and spread the plaster, starting near the ceiling edges. Work fast to keep the surface smooth.
Make sure the plaster is evenly thick across the ceiling. Wait for the first coat to dry before adding a second layer for a smoother finish. Watch the plaster set well before troweling it. Use a float to fix any thick spots.
After the second coat, spray the ceiling with clean water for a better finish. If you want to hire experts, costs depend on the ceiling size. Here’s a rough idea:
| Celing Size | Approx. Cost | Completion Time |
|---|---|---|
| Small (25 SQM) | $875 – $1,375 | 2-3 Days |
| Medium (35 SQM) | $1,225 – $1,925 | 2-4 Days |
| Large (50 SQM) | $1,750 – $2,750 | 3-5 Days |
Remember, drying times affect the completion date. For best results, sand the plaster with grit 80-100 once it’s dry. If you’re thinking about hiring pros, check out plastering services in Ballarat for your plastering needs.

Mixing Plaster: Techniques for a Smooth Consistency
Mixing plaster right is key to a smooth ceiling finish. The right mix of water and plaster is crucial. Aim for a 50/50 ratio to avoid lumps. Always put plaster into the water to prevent clumps.
Understanding the Mixing Process
Start by adding half the plaster to the water and let it soak for 2-3 minutes. This makes the mix smoother. Then, mix well for 1 to 2 minutes, but don’t overdo it. This can weaken the plaster.
Remember, freshly mixed plaster can be used in 5 to 45 minutes, depending on the environment and temperature.
Choosing Between Dry Mix and Ready-Mixed Plaster
Decide between dry mix and ready-mixed plaster based on your project’s needs. Dry mix is better for big jobs because you can control it more. Ready-mixed is great for small tasks but dries fast.
Keep your tools clean to avoid quick setting. Mixing a bit more plaster is smart since it’s cheap and ensures you have enough.
| Type of Plaster | Preparation Time | Working Time | Ease of Use |
|---|---|---|---|
| Dry Mix Plaster | 5-10 minutes | 5-45 minutes | Requires measuring and mixing |
| Ready-Mixed Plaster | No preparation needed | 15-30 minutes | Convenient but dries quickly |
Applying Plaster: Techniques and Tips
Learning how to apply plaster is key for a smooth, lasting ceiling finish. Start with a brown coat as the base layer. This coat should be applied thick to fill in gaps and make the surface even. Use gentle, sweeping motions with your trowel for an even plaster spread, which is crucial for a professional look.
First Coat: Brown Coat Application
Your first layer sets the quality of your work. Begin with a slightly thicker plaster for better control. This layer should be thick, especially over textured surfaces like artex. Use scrim tape for large gaps to prevent cracks later.
Divide large ceilings into sections to avoid visible joins. Pay extra attention to corners and edges to keep them flat.
Finishing Touches with a Smooth Coat
After the brown coat dries, it’s time for the finishing touches. Mist the surface with water before applying the smooth coat for a seamless finish. Choose the right plaster, like Thistle multi-finish, for its versatility and longer setting time.
Applying a second coat is a good idea for new plasterboard ceilings. It improves both looks and durability. Use your plasterer’s float and trowel for the final touches, focusing on consistency and pressure for a perfect finish.

| Step | Details | Tools Required |
|---|---|---|
| Application of Brown Coat | Thick coat to fill gaps and level the surface. | Plastering trowel, bucket, mixer |
| Use of Scrim Tape | For larger gaps to prevent cracking. | Scrim tape |
| Misting Water | Aid for smooth coat application. | Water spray bottle |
| Finishing Coat | Final layer for maintaining aesthetic and structural integrity. | Plastering trowel, float |
Common Ceiling Plastering Mistakes to Avoid
Understanding and recognizing ceiling plastering mistakes can save you a lot of time and trouble. Many homeowners run into problems because of a few common errors. Knowing these mistakes helps you improve the quality of your work.
Identifying Common Errors
There are several mistakes to avoid in ceiling plastering that can affect the final look. Here are some of the most common ones:
- Improper surface preparation: Not cleaning and priming the ceiling well can cause cracking and peeling.
- Inadequate mixing of plaster: Mixing plaster incorrectly can make it set poorly, leading to a weak finish.
- Not allowing enough drying time: Hurrying the drying process can cause cracks and delaminations.
- Using wrong types of plaster: Picking plaster not right for your job can make the process harder.
- Poor application techniques: Putting plaster on too thick or too thin can result in uneven surfaces and poor sticking.
Best Practices to Ensure a Flawless Finish
To get the best results in your ceiling plastering project, follow these best practices:
- Thorough preparation: Clean the surface, remove dust, and fix glossy areas.
- Proper material selection: Pick the right plaster and follow the maker’s mixing advice.
- Careful application: Use thin, even coats with quick strokes for a smooth finish.
- Monitor environmental conditions: Watch the temperature and humidity, as they can change plastering results.
- Allow adequate curing time: Let your plaster cure fully between layers to prevent future issues.
Conclusion
Plastering a ceiling might seem hard, but it’s doable with the right tools and skills. It’s key to know the basics and pay close attention to detail. Avoiding common mistakes will help you get professional-looking results.
Starting a plastering project can make your space look better and last longer. It also adds insulation. Think about what finish you want, the condition of your ceiling, and your budget when choosing a plastering method.
If you run into problems while plastering, don’t worry. Just call us at 0480024189 for help. With the right advice, you can make your DIY project a success. You’ll end up with a space that shows off your style and taste.