
Fixing cracks in plaster walls might seem tough, but it’s doable with the right tools and knowledge. Many homeowners see hairline cracks due to house movements and temperature changes. With the right materials and steps, you can fix plaster wall cracks on your own.
This guide will walk you through fixing plaster cracks yourself. We recommend using Toupret Fill Flex for filling cracks. This product can be injected into the plaster for a smooth finish. You’ll learn how to widen and deepen cracks with a Stanley knife or apply filler with a caulking gun. Each step is important for a repair that lasts.
Understanding Plaster Cracks
It’s important to know why plaster walls crack. These cracks can come from things like weather changes and the house settling. Knowing what kind of crack you have helps you fix it right. Small cracks can be fixed at home, but big ones might need a pro.
Common Causes of Cracks
Several things can make plaster walls crack:
- Moisture: Water damage can cause bubbles and color changes.
- Temperature fluctuations: These can make plaster expand or shrink.
- Settling foundations: New houses often settle in the first ten years.
- Vibrations: Being near busy roads can cause cracks from vibrations.
Types of Cracks in Plaster
Cracks in plaster walls come in different sizes and types. Knowing what kind you have helps you fix them:
| Type of Crack | Description | Severity |
|---|---|---|
| Hairline Cracks | Thin, usually minor issues caused by drying. | Low |
| Spiderweb Cracks | Delicate cracks that can indicate slight movement. | Low |
| Diagonal Cracks | May suggest structural issues and require evaluation. | High |
| Bubbling Cracks | Result from moisture issues needing immediate attention. | High |
| Large Cracks | Cracks wider than 1/4 inch indicate significant structural problems. | Critical |
Assessing the Damage
It’s important to understand the condition of your plaster walls before fixing them. Look closely at the cracks to see how big they are. This helps you decide if you need a simple fix or a bigger repair job.
Identifying Minor vs. Major Cracks
Plaster wall cracks can be different sizes. Small cracks, under 5mm, usually come from normal settling or slight changes in temperature. These small cracks are not a big deal and can be fixed easily.
But, big cracks over 25mm could mean serious problems, like foundation issues or big temperature changes. These large cracks need quick action to stop more damage. Fixing them might mean taking apart and rebuilding parts of the wall.
It’s key to know the difference between small and big cracks for the right repair plan. For small cracks, you might fix them yourself. But for big damage, you might need a pro, especially if soil movement or plants near the wall are causing problems. Learn more about expert plastering services here.
Tools and Materials Needed for Repair
Fixing cracks in plaster walls needs the right tools and materials. Having the correct items lets you do the job well. Here’s a list of key tools and filler products for a top-notch repair.
Essential Tools for Plaster Repair
- Utility knife or Stanley knife
- Putty knives (preferably a 4″ knife for applying compounds)
- Sanding materials, such as fine-grit sandpaper
- Caulking gun for flexible fillers
- Paintbrush or roller for finishing
Before starting plaster repair, clean the area well and protect what’s nearby. Mistakes like using the wrong tools or not waiting for things to dry can ruin your work.
Recommended Filler Products
Picking the best filler products is key to a successful repair. Here are some top choices:
| Product Name | Description | Best Use |
|---|---|---|
| Toupret Fine Surface Filler | Lightweight, easy to sand | Small cracks and imperfections |
| UGL Plaster Patch | Quick-drying, suitable for large repairs | Medium to large cracks |
| Joint Compound | Easy to apply, versatile | General plaster repairs |
| Plaster of Paris | Fast-setting compound | Delicate repairs; use with caution |
Knowing the right tools and filler products is key to fixing plaster wall cracks well. A good toolbox helps you get professional-looking results from your repairs.
How To Fix Cracks In Plaster Walls
Fixing cracks in plaster walls can be easy if you know the right steps. It’s important to prepare well and use the right techniques for plaster wall crack repair. Don’t just cover the cracks with filler, as they might come back. A thorough check and preparation of the crack are key.
Start by widening and cleaning the crack. This helps the filler bond better and prevents future problems. For small hairline cracks, use Toupret Flexible Filler. It’s flexible and moves with the wall.
There are different types of cracks you might see:
- Hairline cracks: These are thin and often appear in the first decade of a home’s life.
- Straight line cracks: These might show the house is settling, but they’re usually not a big deal.
- Bulging cracks: These need more work because they show the plaster is coming off the wall.
- Bubbling cracks: These come with bubbly paint and might mean there’s a leak, so you should get expert help.
If a crack is 1/4 inch to 1/2 inch wide, you should act fast. Cracks wider than 1 inch could mean serious issues and you should get a pro to check it out.
Use tools like a Stanley Knife, filling knife, and sandpaper for fixing plaster wall cracks. Choose between premixed joint compounds or powdered fillers based on how fast you want it to dry. Make sure to let it dry well before applying a final coat.

By following these steps, you can keep your plaster walls looking great and avoid cracks from coming back. Plan and execute your plaster wall crack filling well for lasting results.
Step-by-Step Guide to Repairing Hairline Cracks
Fixing hairline cracks in plaster walls might look hard, but it’s doable with the right tools and steps. This guide will show you how to prepare and fix these cracks for a lasting repair. By following these tips, you can keep your walls looking good and strong.
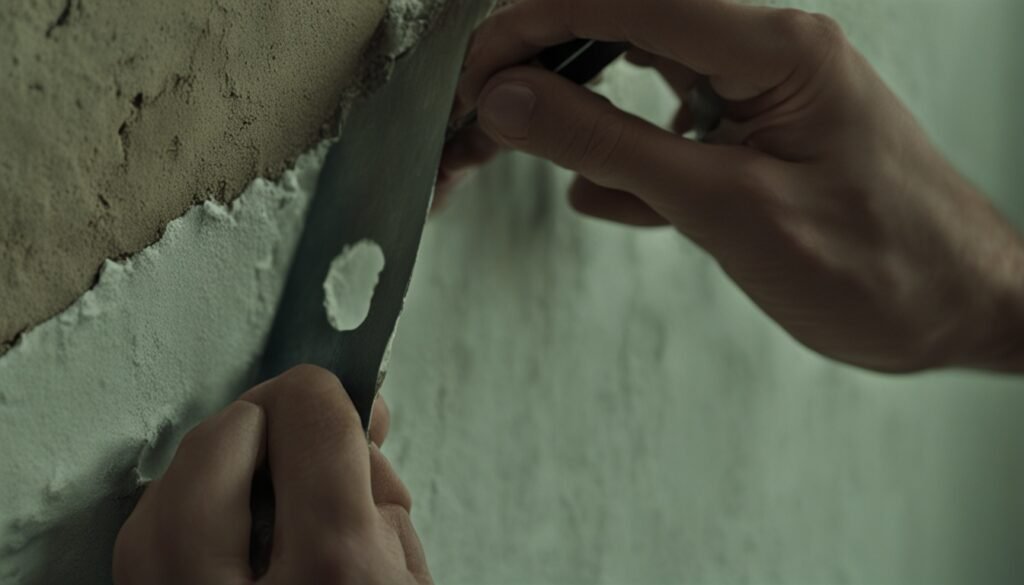
Preparing the Crack for Repair
First, check the crack and widen it a bit with a utility knife. This makes sure the area is clean and ready for repair. It also stops the crack from getting worse. Look for any other problems that might have caused the crack to form. Fixing these issues will help stop more cracks from happening.
Filling and Smoothing the Crack
After getting the crack ready, fill it with a flexible filler like Toupret Fill Flex. Use a caulking gun or a filling knife to make sure it goes all the way in. Then, use a damp sponge or straightedge to smooth it out. Let the filler dry completely, as the instructions say. Finally, add a fine surface filler if needed for a smooth finish.
| Step | Description | Materials Needed |
|---|---|---|
| 1 | Assess and clean the crack | Utility knife, brush |
| 2 | Apply flexible filler | Toupret Fill Flex, caulking gun or filling knife |
| 3 | Smooth the filled area | Damp sponge or straightedge |
| 4 | Allow to dry | Time (refer to product instructions) |
| 5 | Add fine surface filler if necessary | Fine surface filler |
With the right steps and materials, you can fix hairline cracks in plaster walls easily. This guide will help you get professional-looking results at home.
Repairing Larger Cracks
Dealing with big cracks in plaster needs a careful plan for a strong fix. First, open up the crack to make a clean spot for filling. This makes sure the filler sticks well. It’s the first step to fixing plaster wall cracks right.
Opening Up the Crack
Begin by widening the crack with a utility knife. This removes loose plaster and makes the edges clear. A clean edge means better filler adhesion and less future trouble.
Cracks over 5mm need extra work because they might show deeper issues. Look for jagged edges or diagonal patterns. These could mean there are bigger problems.
Applying Multiple Layers of Filler
After getting the crack ready, start plaster wall crack patching with the first layer of filler. Make sure it goes deep into the crack to fill all gaps. Let this layer dry fully before adding more.
Using two to three layers will make your repair strong and match the wall. Always pick top-quality materials for better results.
To finish like a pro, sand the area between layers for a smooth surface. This makes the final paint or texture stick well. It also makes your plaster walls look new and keeps your home solid.
For top-notch drywall plastering, contact Local Plasterer in Melbourne for help.
Finishing Touches After Repair
After fixing your plaster walls, paying attention to the finishing touches can make a big difference. Steps like sanding, priming, and painting make the repairs blend in well with the rest of the wall. This creates a smooth look that makes your plaster wall repairs almost invisible.
Sanding the Repaired Area
First, let the repair dry completely before sanding. Use fine-grit sandpaper for a smooth surface. Sand gently until the repaired area matches the wall. This ensures the paint and primer work well, making your repairs look great.
Priming and Painting
After sanding, apply a primer to the repaired spots. This step is crucial for better paint adhesion and to prevent issues from showing through. Choose a primer made for plaster for the best results. Once the primer dries, pick a paint that matches your wall’s color. This final step refreshes your walls and finishes the repair job.
| Task | Details |
|---|---|
| Sanding | Use fine-grit sandpaper to smooth the repaired area. |
| Priming | Apply a plaster-specific primer to seal and prepare the surface. |
| Painting | Select a quality paint that matches the wall for uniform appearance. |
| Drying Time | Allow at least 24 hours for both primer and paint to dry completely. |
Tips for Maintaining Plaster Walls
Keeping your plaster walls in good shape is key. By following some simple tips, you can make them last longer. Also, taking steps to prevent cracks can save you a lot of work later.
Preventative Measures for Future Cracks
To stop cracks from showing up on your plaster walls, try these steps:
- Keep your home’s temperature and humidity in check. Too much moisture can make plaster weak and crack.
- Check your walls often for any small problems. Fixing them early can stop bigger issues later.
- Use Gyproc Easi-Fill 20 for small repairs. It helps fix cracks before they get bigger.
- Apply plaster compound in small areas at a time. This helps spread it evenly and avoids cracks.
Common Maintenance Practices
Regular upkeep is crucial for plaster walls. Here are some tips to follow:
- Let each layer of plaster dry fully before adding more. Hurrying can cause cracks or unevenness.
- Apply fillers or compounds evenly. This makes sure they’re the right thickness and look smooth.
- Clean your plaster with a damp cloth to remove dirt. This prevents moisture from getting trapped.
- For big repairs, think about hiring pros like Southern Ceiling Repairs. They can do a great job.

The Importance of Proper Repair
Fixing plaster issues in your home is key for looks and strength. Cracks left unattended can cause moisture, leading to mold and weakening walls. Knowing how to fix plaster right keeps your space looking good and safe.
Plaster walls bring beauty and history to rooms. Keeping them in good shape means more than just making them look nice. It means fixing cracks with polymer-modified paste and using a special plaster mix to prevent shrinkage.
It’s important to fix cracks quickly, especially big ones that could mean bigger problems. Vertical cracks might seem small but need quick action. Fixing them helps keep your home’s value up and everyone safe.
When to Call a Professional
Tackling plaster repairs yourself can be rewarding, but some situations clearly show you should hire a pro. If the damage is big or cracks come back quickly, it’s time to call an expert. These signs might mean there are deeper issues that need special skills.
It’s key to know the difference between small cosmetic issues and big structural problems. Horizontal cracks could mean serious issues like uneven soil or weak foundations. Vertical or diagonal cracks, plus changes in doors and windows, also point to big problems that need a pro’s look.
Getting a pro for plaster repairs means better quality and can save you money later by stopping more damage. DIY fixes might look good at first but often can’t match the lasting results of expert work. If you’re unsure about what repairs you need, knowing when to ask for help can really help.
| Signs You Need a Professional | Potential Issues |
|---|---|
| Extensive damage | Underlying structural problems |
| Recurring cracks | Failure of temporary repairs |
| Water stains accompanying cracks | Potential water damage |
| Changes in functionality of doors/windows | Foundation or framing issues |
Conclusion
Learning how to fix plaster cracks is key to keeping your home looking great and lasting longer. This guide has shown you how to check the damage, pick the right tools, and use effective repair methods. By doing this, you can make your plaster look better and last longer.
Plaster cracks often happen due to normal wear, changes in the weather, or shifting foundations. Keeping up with maintenance and using quality plaster helps stop new cracks from forming. This guide has given you the skills to fix small cracks on your own.
If you have big cracks or a lot of damage, it’s best to get help from a pro to avoid more problems. For fixing plaster cracks in Melbourne, use the methods we talked about for good results. If you have questions or need advice, just call us at 0480024189.